Create and publish your first Ruby gem
This step-by-step tutorial will show you how to create a simple Ruby gem and publish it to RubyGems.org.
Before starting this tutorial, do the following:
Install Git.
Register your GitHub account in RubyMine.
Install the Ruby distribution for your platform.
Create a Gem application
To create a new Gem application, follow the steps below:
Run RubyMine and click New Project on the Welcome Screen.

In the New Project dialog, select Gem on the left pane and specify the following settings:

Location: Specify a project's location and name (hello_rubymine in our case).
Ruby SDK: Select a required Ruby interpreter.
After you’ve specified all the options, click Create in the New Project dialog. RubyMine will create a new Gem application.
Add code
Code for gems is placed within the lib directory. Our newly created project contains the hello_rubymine.rb file in this folder. Let's add working code for our gem:
To open hello_rubymine.rb, press Ctrl+Shift+N, start typing hello_rubymine.rb, select this file, and press Enter.
In the opened lib/hello_rubymine.rb file, add the following code:
require "hello_rubymine/version" module HelloRubymine def self.greet(name) puts "Hello, #{name}! I'm Ruby!" end end
Provide gem specification
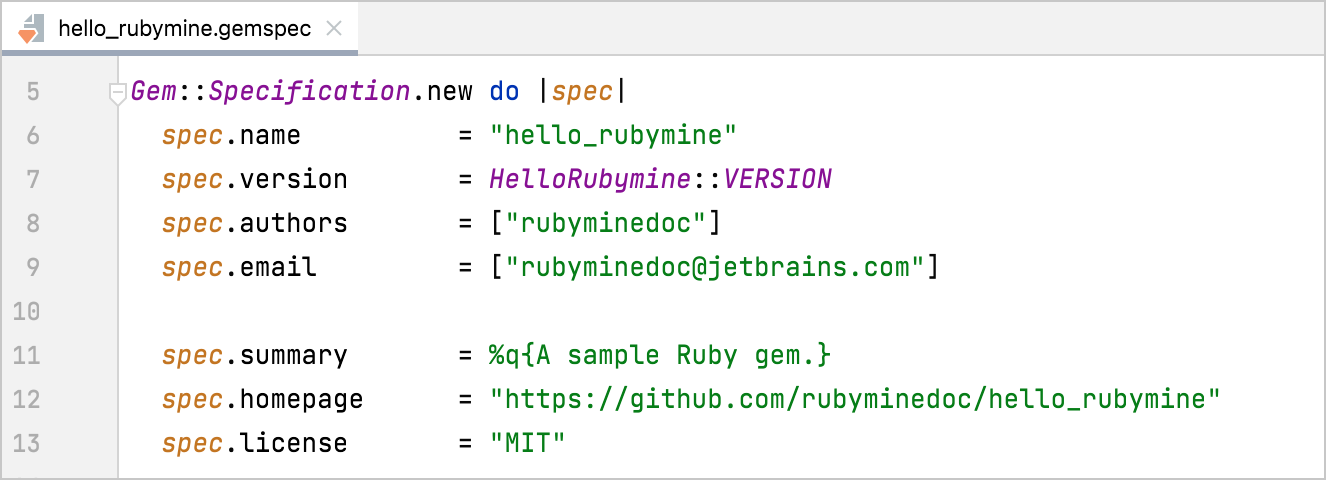
Every gem project has the *.gemspec file containing information for a gem. In our project, this information is stored in the hello_rubymine.gemspec file. Perform the following steps to provide the required data:
Press Ctrl+Shift+N, start typing hello_rubymine.gemspec, select the hello_rubymine.gemspec file, and press Enter
In the opened hello_rubymine.gemspec file, specify the required gemspec attributes.

For our sample gem, we've specified the following fields:
authors: A gem's author(s).email: An email address.summary: A short gem's descriptionhomepage: The URL of the gem's home page. We'll specify this address later after publishing the gem's code to GitHub.metadata["source_code_uri"]: The gem's source code URI. We'll use the same value as for thehomepage.metadata["allowed_push_host"]: We removed this string from *.gemspec for publishing to RubyGems.
Share gem on GitHub
In this part, we'll publish our gem's source code to GitHub:
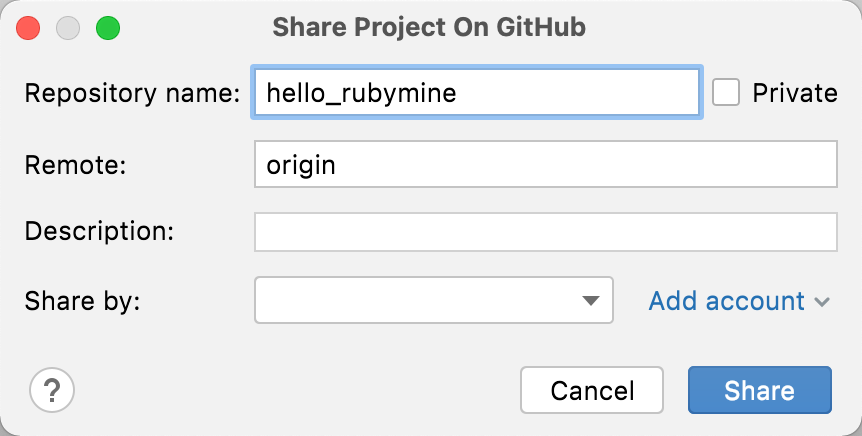
Go to .
In the invoked dialog, specify the name of the repository to be created on GitHub. Then, select the required account in the Share by field and click the Share button.

In the next dialog, you will be prompted to choose files for the initial commit. Leave the default set of files, specify the commit message, and click Add. Then, wait until a project is pushed to GitHub.
After the project is created on GitHub, provide the
homepageandmetadata["source_code_uri"]attributes in the project's *.gemspec file (https://github.com/rubyminedoc/hello_rubymine in our case). Then, commit and push changes made in *.gemspec.
Build gem
After we've made all changes in *.gemspec, we can build a gem:
In the main menu, go to Tools | Gem | Build Gem.
In the invoked dialog, click the Build button to build the gem. RubyMine will display the information about the created gem in the Run tool window.

You can see the created gem in the Project view (Alt+1).
Install gem
After building a gem, we can install it to a local SDK for testing:
Press Ctrl twice and enter the following command:
gem install hello_rubyminePress Enter to install a gem.
Test gem with IRB
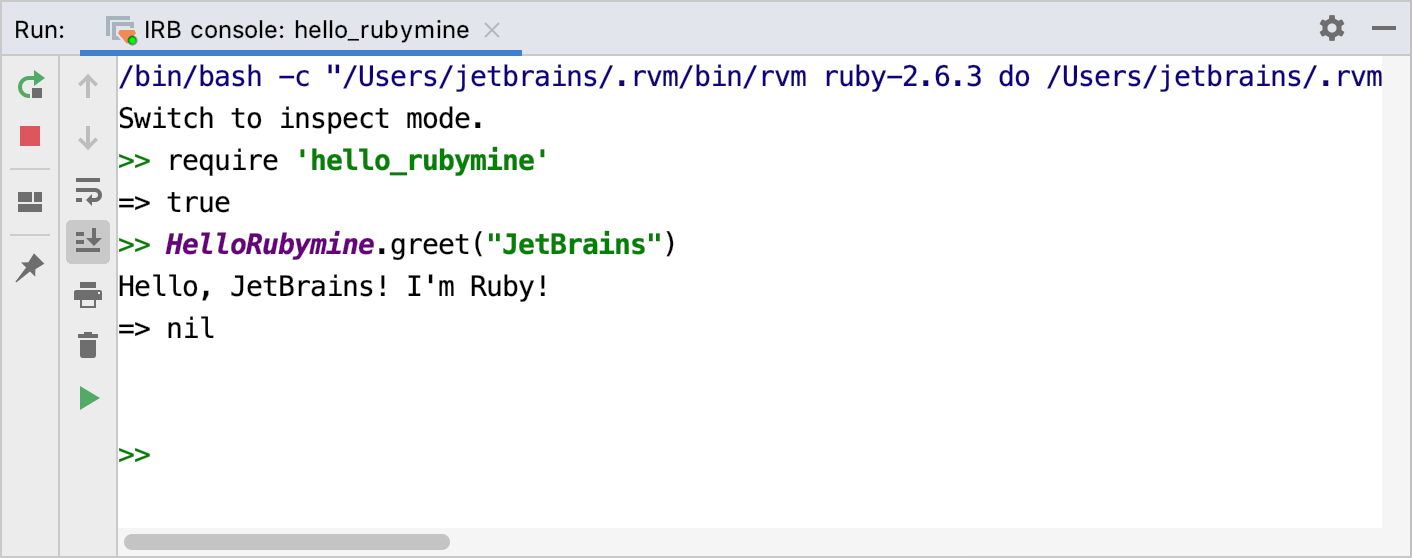
In this chapter, we'll test our gem using the IRB console by calling it's greet method:
In the main menu, go to .
Type
require 'hello_rubymine'and press Enter to load our gem to IRB.Then, type
HelloRubymine.greet("JetBrains")in a console and press Enter again to make sure our gem works as expected.
Publish gem
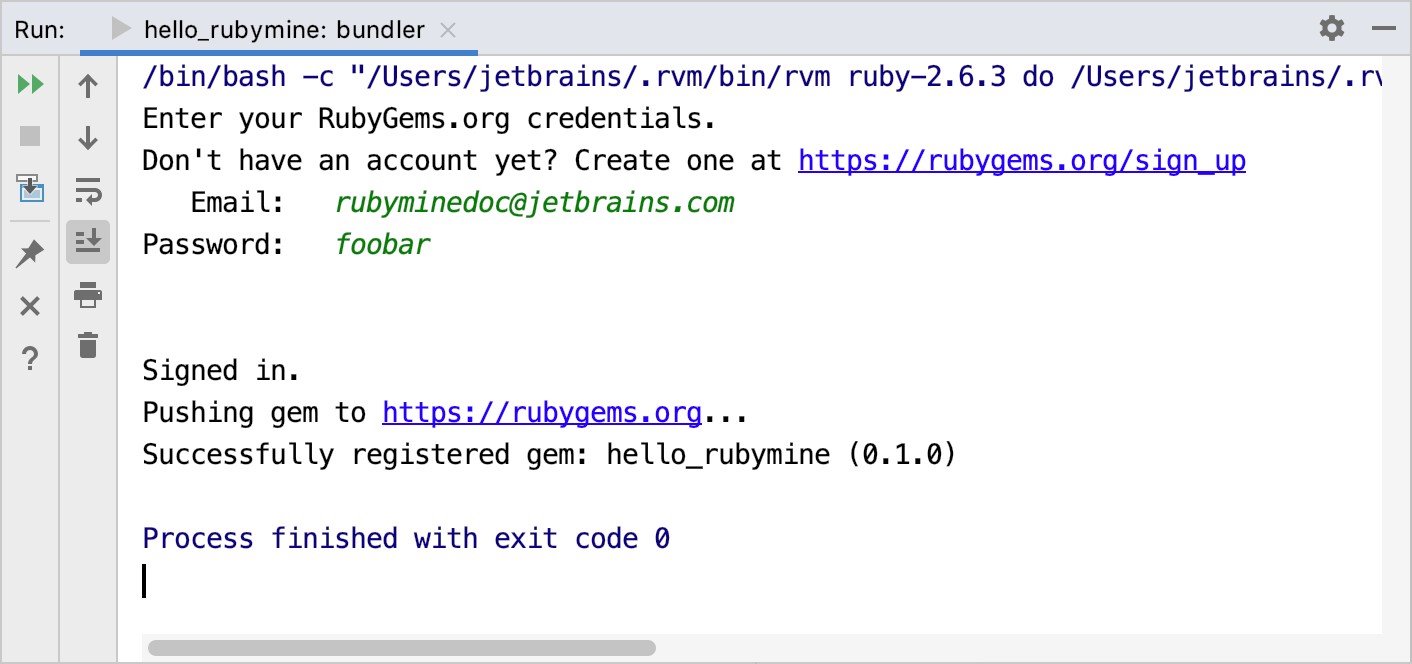
Finally, we'll publish our gem to RubyGems.org. Note that you need an account at RubyGems.org to do this.
Go to .
In the Run tool window, specify your RubyGems credentials.

Your gem will be published to RubyGems.org.